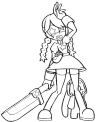
Translucent parts have a different formula for displaying stuff. I have to manually flag translucent IDs in official palettized sprites (e.g. when clicking the Squigly tab, the translucent option for color ID #43 is automatically toggled).
View attachment 24982
Custom sprites have no uniform color map, so I unfortunately can't set default translucent IDs for them. You'll have to toggle it every time for any custom sprite.
If you'd like a better understanding of how the official palettized sprites do the transparent parts, I recommend downloading one of those sprites
[sample] and inputting it into this other site of mine
[split-rgba].
The red channel (RRR1) is the area layer, the green channel (GGG1) is the line layer, and the blue channel (BBB1) is the detail layer made from the raw and base layers.
Notice how in BBB1, the whole flame area is brighter than the grey background which has an intensity of 102.
So TL;DR you'll want to add 100 to the translucent parts (in both the Raw and Base layers).
- Magic Wand the translucent areas in your Base or Area layers
- add a new layer
- Paint Bucket the selection grey (rgb=100,100,100)
- change the layer blend mode to Linear Dodge
- right click the layer and make it a Clipping Mask for the Raw layer
- update the color in your Base layer to reflect the brightened area in the Raw layer
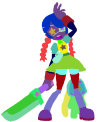
Resulting in:
View attachment 24983View attachment 24984(I added 128 here instead of 100, oops)
Not perfect, but it'll look better than using the actual Raw layer.
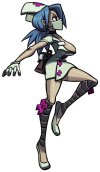
[update]
original raw vs raw with brightened flame:
View attachment 24987
...better, but only barely
eh, either way, i think it works well enough


.png")


 (if there’s any errors, please let me know!)